Recently, I had to publish a backend written in the NestJS framework on the App Platform from DigitalOcean, and I ran into an interesting problem. Symptoms? Dependencies from npm download correctly, the container is also created without any problems, even the container with the server starts correctly, but it is immediately closed, with information from DigitalOcean that the build was not completed correctly, and no error in the terminal. After a little research I found that in the case of NestJS you need to make a small change in the configuration of the service.
Technically, the process of deploying an application written in NestJS in DO App Platform is almost no different from other popular frameworks, except for the fact that NestJS does not use an environment variable called $PORT, so when configuring the service, we must specify the port on which our server will run, and that's it really, but for the sake of professionalism, let's go through each step in turn.
Creating running NestJS app in DigitalOcean App Platform
To begin with, we visit this page, if it asks to log in, we log in or create an account. After opening it, you should see a button with the inscription "Create app" and click on it.
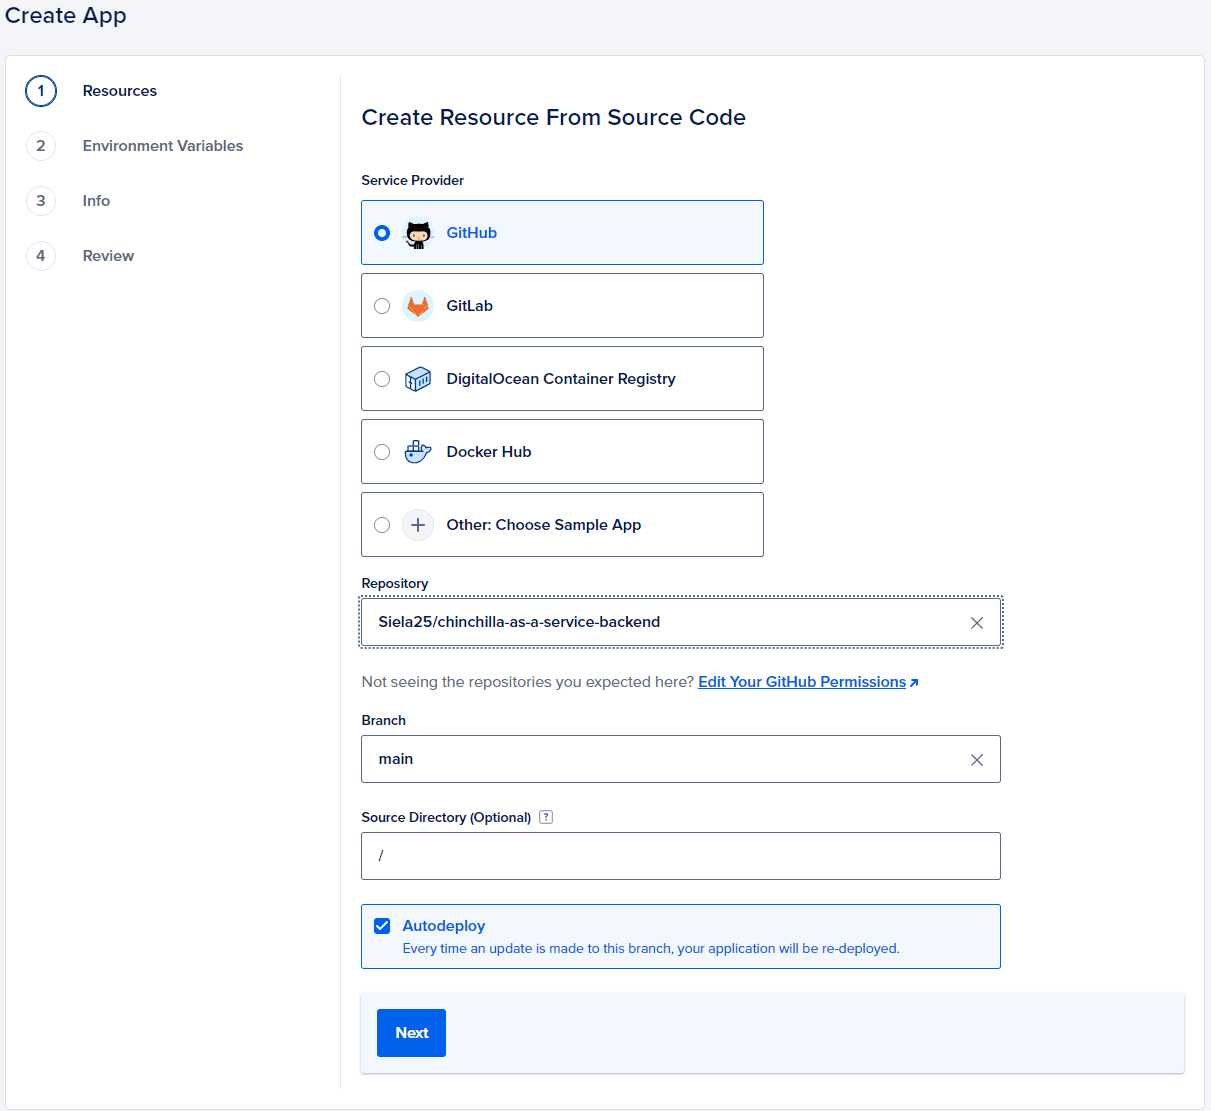
In the first window, we choose where DO should download our source code from. At the time of writing this article, there are sources like Github, Gitlab, Docker Hub, DO Container Repository, or you can choose some template with sample. I will choose the Github option. If you do not have a DigitalOcean account paired with Github, you can do it in this step, once you have an account paired, a list will appear with the repository selection.
After selecting the repository, 2 additional options will appear, "Branch" and "Source directory". I don't change anything because my main repository is "main" and the source code is in the root directory, which is "/".

The "Autodeploy" option causes that each time some changes are made to the repository marked above, the application will rebuild itself. Useful thing, so I leave it active, and click "next".
In the next window, we can choose a payment plan for our service, here we change the options at our discretion. Just remember that you cannot select the static service option, because this option only works as we deal with static websites.
In the next window, we can specify environment variables. If your application requires any, this is a good place to define them. The next window can also be skipped, unless you want to give your own name to the application, then you can change it now.
Now there should be a summary window, and this is where we need to make a small change. In the first category called "Resources" there should be a tile with the name of the repository, and on the right side of this tile, the "Edit" option, click on it, and in the window that appears, there should be the "HTTP Port" property. This is where we specify the port on which our backend works by default. If we do not do this, and the port on which our backend works will be different than the default one, we will experience the symptoms I mentioned at the beginning of this article.
After changing the port, click "back" and then "Create resource". Well done, we have successfully launched our new service.
What if I have running service?
Don't worry, you can do the same with an already "running" service. Just go to it, go to the "settings" tab, then click on the component whose port you want to change, and at the very end there should also be an "HTTP Port" option. You change it, wait for the component to build with the new configuration, and you can enjoy a properly working application.
